The following article was originally published by Dr. Bones & Nurse Amy on December 18, 2010. It is featured here with their permission.

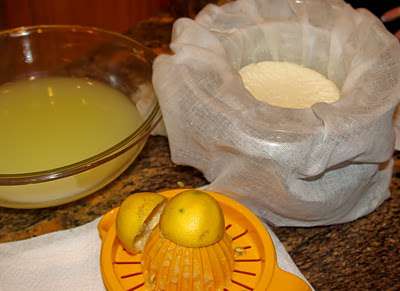
Nurse Amy's homemade Prepper Cheese. Cheese is in the cheesecloth, and the whey is seen in the bowl to the left.
Cheese making is basically a method of separating curds and whey from the milk, and then depending on the type of cheese, allowing the cheese to grow cultures over a period of time. The picture has some cheese I made, in the cheesecloth, and the whey is seen in the bowl. Like I said there are many complicated ways to do this and some involve bacteria cultures, rennet and covering the cheese with wax. They may also involve a long waiting period before the cheese is ready to be eaten. Although you MAY have the time and ingredients to make cheese this way, I believe if the “what if” happens, most of us will be stuck with powdered milk, unpasteurized unfiltered white vinegar and hopefully a way to have lemon juice. I have found buttermilk powder and also whole milk powder that I will be adding to our storage very soon. The additional cream will enhance the taste and consistency of your cheese. I encourage everyone to add all of these items in your storage supplies. There are even recipes to make your own vinegar if you have to.
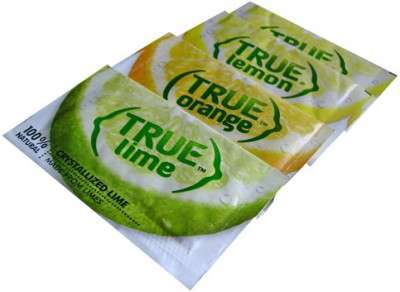
 OK, so you have stocked up on powdered milk, buttermilk and cream, and also unpasteurized unfiltered vinegar and powdered lemon juice. I found a product called true lemon with individual packets equaling 1 tablespoon of reconstituted lemon juice. All of these items will help you make a great tasting cheese.
The “prepper” cheese is made from milk and either lemon juice or vinegar. That's it, two ingredients! If you can either use whole milk or add some “cream” to your milk, again if will add to the flavor and you will get more curds.
The equipment is a pot, don't use aluminum. Stainless steel with a thick bottom is best.
A colander, long stirrer,a cheesecloth T-shirt or a pillowcase for catching the curds, and some salt for taste.
Herbs would add a nice flavor but only if you want them. A cooking thermometer is good to have but not 100% necessary. Clean and sterilize all of your equipment prior to use.
If you are using your storage supplies, reconstitute the powered milk, cream, buttermilk and/or lemon juice so they are ready in advance.

photo credit: kids-cooking-activities.com
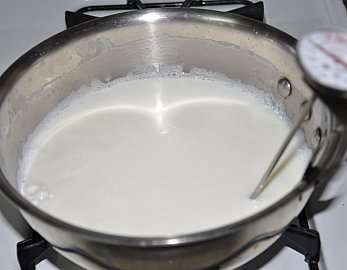
Heat one total gallon of milk to about 175 degrees, while stirring frequently to avoid scalding. If you don't have a thermometer eyeball the milk until the sides of the milk surface begin to make small bubbles along the pot edge and looks frothy. You do not want it to boil, which is why you need to be looking for the frothy edges. Adding cream or buttermilk to low-fat or non-fat milk prior to heating would make more curds.
After it reaches 175 degrees, add 4 tablespoons of lemon juice ( my favorite) or 1/4 cup of vinegar to the milk. Remove the pot from the heat and let it sit for about 15 minutes.
Do not touch the milk while it is sitting. You will see the curds forming on the surface and a greenish fluid settling in the bottom of the pot. The fluid is the whey.
After 15 minutes, pour the milk into a cheesecloth lined colander sitting in a bowl. The curds will be caught in the cheesecloth and the whey will drip into the bowl. Let this sit for 10 minutes while the whey is dripping.
After the whey has drained, pick up the cheesecloth edges and hang the cheesecloth over a bowl for 1/2 hour. Now you have cheese that can be salted to taste. Herbs would add more flavor if desired. 1 gallon of milk equals about 1 pound of cheese. The cheese can be refrigerated for up to 1 week. If the what if has happened, eat it up now or use it to make some cheesy dish.
Prepper cheese is delicious on prepper bread!
If you used lemon juice for the cheese processing, you can reheat the whey with another gallon of milk to 200 degrees. Remove from the heat, add 1/4 cup of vinegar, strain it, drain it, salt to taste and you have ricotta! This cheese will have a creamier consistency and spread easier too. I added fresh dill and served it with plain crackers. Again, it will last about 1 week under refrigeration.
On another note, after I made the two cheeses I was left with a lemon juice, vinegar, calcium rich whey. I looked at my tomato plants, which had the lower leaves turning yellow and thought this might be a good misting fluid. Lemon juice and vinegar are both commonly used in organic gardening as a disease treatment, and tomato plants need extra calcium. So I let the whey cool off and sprayed the whole tomato plants from top to bottom for a good soaking. I have to tell you I have tried around 10,000 different organic treatments for this leaf disease, well maybe not that many but it sure seems like it, and NOTHING worked! Each day another lower branch of leaves were turning yellow and beginning to die. However, the day after this spraying the yellowing halted. It has been 7 days and the plants are so green and new branches are now growing where the old rotted off branches had been. I can only say this is a miracle!
I suggest you begin to try different combinations of milk, cream and buttermilk to see which one you prefer. Use your powdered storage so if the what if happens you will already know what combination your family likes. Every skill you can practice gives you the confidence that you can provide nutrition for your loved ones. Practice using your stored foods. Serve them for meals to see if they work for your family. Nothing would be worse then having a large storage of foods your family hates.
Nurse Amy


No comments yet.